
Your First DIY Head Tracker: A Step-by-Step Assembly Guide
If you want to build custom gear, following a clear diy head tracker guide makes the entire process fast and easy. Consequently, assembling your own tracking kit gives you total control over your sim setup.
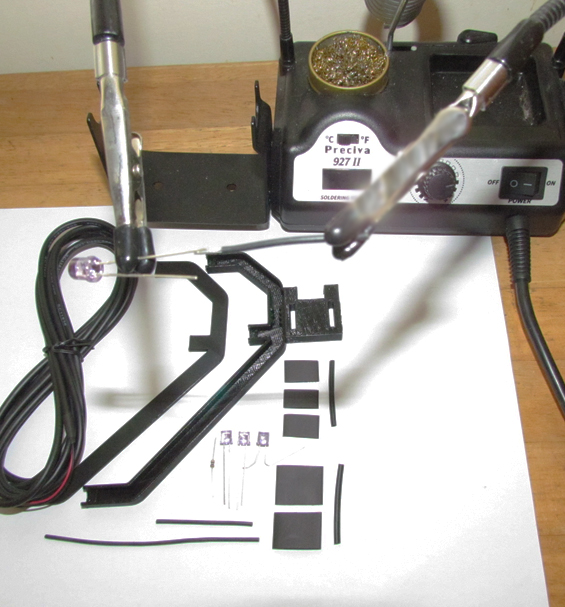
There is a special satisfaction that comes from building your own gear. Specifically, our DIY Head Tracker Kits provide everything you need to create a high-performance 6DOF unit. Therefore, this comprehensive diy head tracker guide will walk you through each stage of construction.
Ready to start your project? Grab your complete DIY Head Tracker Kit from our shop!
Essential Tools for Assembly
Your kit includes core components like the printed circuit board (PCB), IR LEDs, resistor, and USB cable. In addition, you will need a few basic workshop tools before starting:
- A soldering iron and solder
- Wire cutters and strippers
- A helping hands tool for stability
- Protective eyewear
Step-by-Step Build Instructions
Step 1: Preparing the Board and Components
First, lay out your PCB and components on a clean workspace. Next, identify positions for each of the three IR LEDs and the resistor. Note that LEDs have polarity, meaning the longer leg is the positive anode. Furthermore, the PCB board features markings showing exact orientation.
Step 2: Soldering the Components
Carefully solder the resistor and each LED onto the circuit board. For best results, solder joints should look shiny and cone-shaped rather than dull. Because soldering irons generate intense heat, always work in a well-ventilated space with protective eyewear.
Step 3: Final Wiring and OpenTrack Testing
In addition, attach the USB power cable to the designated pads on the board. Once assembled, connect the tracker to your PC and launch open-source software like OpenTrack to calibrate your device. As a result, you gain natural 6DOF head movement across your favorite simulators.
Why Choose a Custom DIY Head Tracker Setup?
Building your own infrared clip delivers commercial-grade tracking performance at a fraction of the cost. Furthermore, maintaining or modifying your rig in the future becomes simple once you understand the basic hardware structure. Therefore, DIY building is the best route for custom setups.
Consequently, congratulations on completing your custom build! Now you are ready to enjoy full virtual cockpit immersion.